The Scheduling grid layout
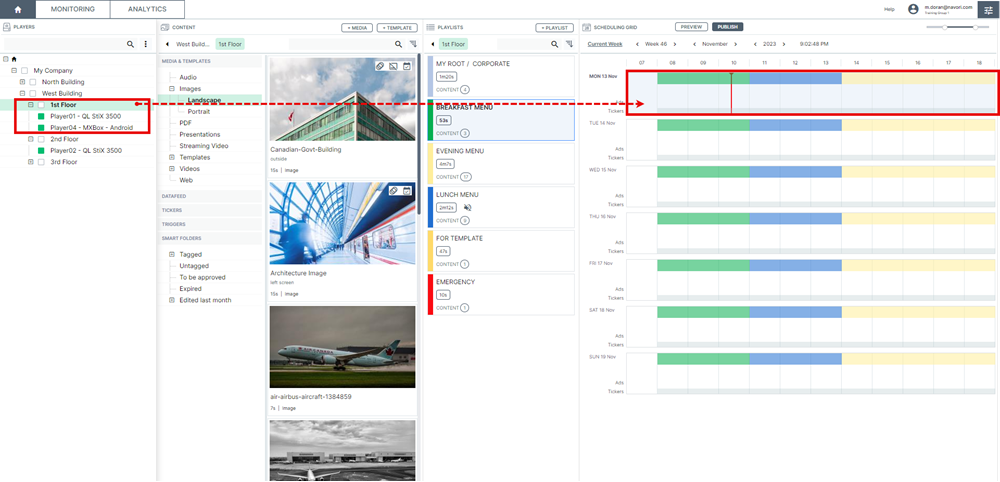
The Scheduling grid is where you program your playlists.
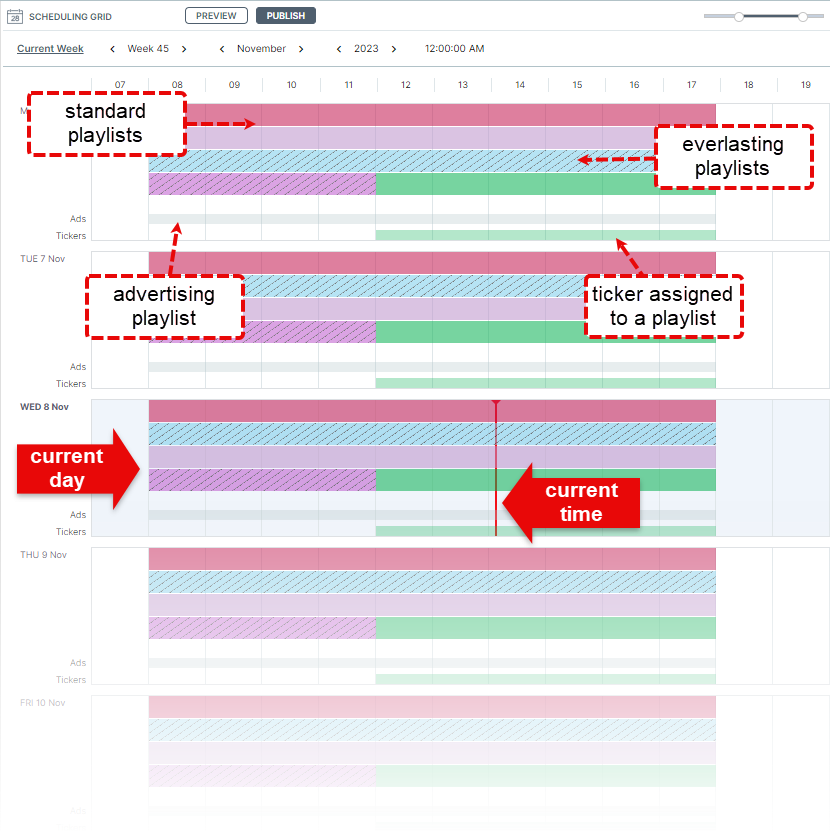
- The grid is divided into 7 days.
- The current day is shown in a shaded gray color.
- The current time is shown as a red line.
- You use the vertical scroll bar or the mouse scroll wheel to move the grid up and down.
- The colored bands at the top of each day represent playlists. Shaded bands represent everlasting playlists.
- The bottom band named “Ads” will only appear when an advertising playlist is programmed.
- The gray and colored bands that appear near the bottom of each day represent published tickers.
- Gray = published ticker appears on screen regardless of the playlist scheduled
- Color = ticker assigned to a playlist appears on screen only when that playlist is scheduled
The Scheduling grid toolbar
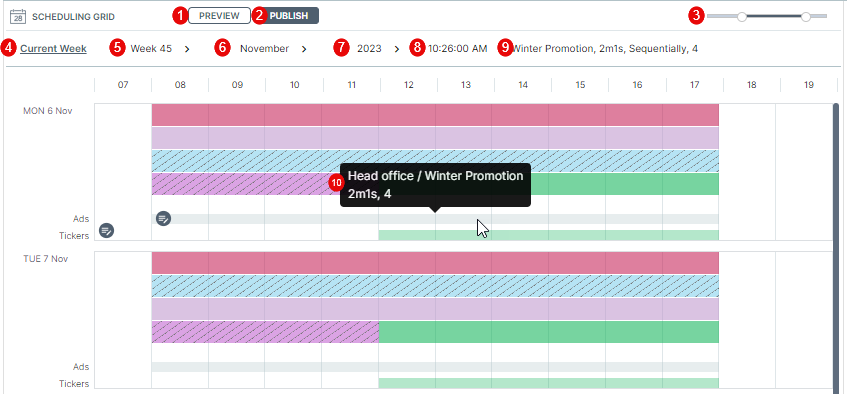
- The PREVIEW button opens the program preview window.
- The PUBLISH button at the top of the Scheduling Grid updates the selected players in background. There are no popups or other visible cues while this is happening.
- The Zoom View slider lets you adjust the Scheduling Grid view so you can better see the details of your programming. You can stretch out to a 24 hour view or zoom in to see a specific period of the day.
- If you navigate to a future or past week, clicking on the Current Week button will return you to the current week view.
- Use the < > arrows to navigate forward and back one week at a time.
- Use the < > arrows to navigate forward and back one month at a time.
- Use the < > arrows to navigate forward and back one year at a time.
- Shows the current time according to the mouse cursor’s position in the grid.
- Shows the details (name, duration, number of items) of the playlist or ticker on which the cursor is currently hovering.
- Same as above but in a bubble.
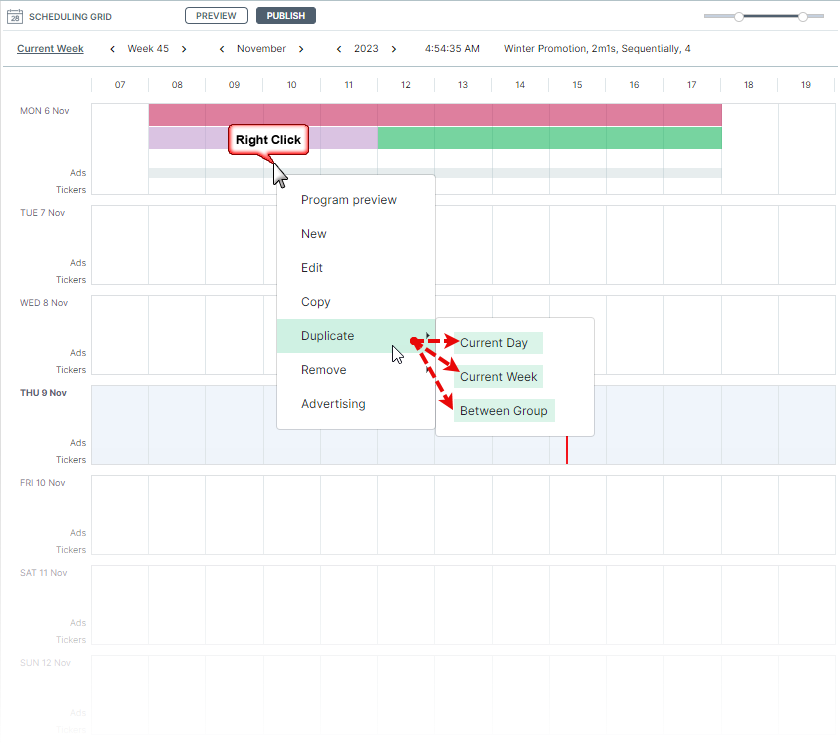
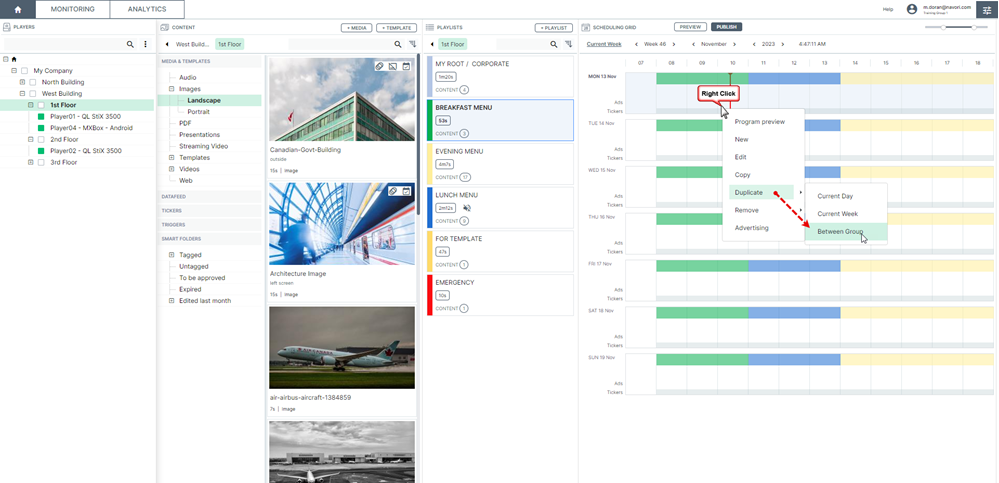
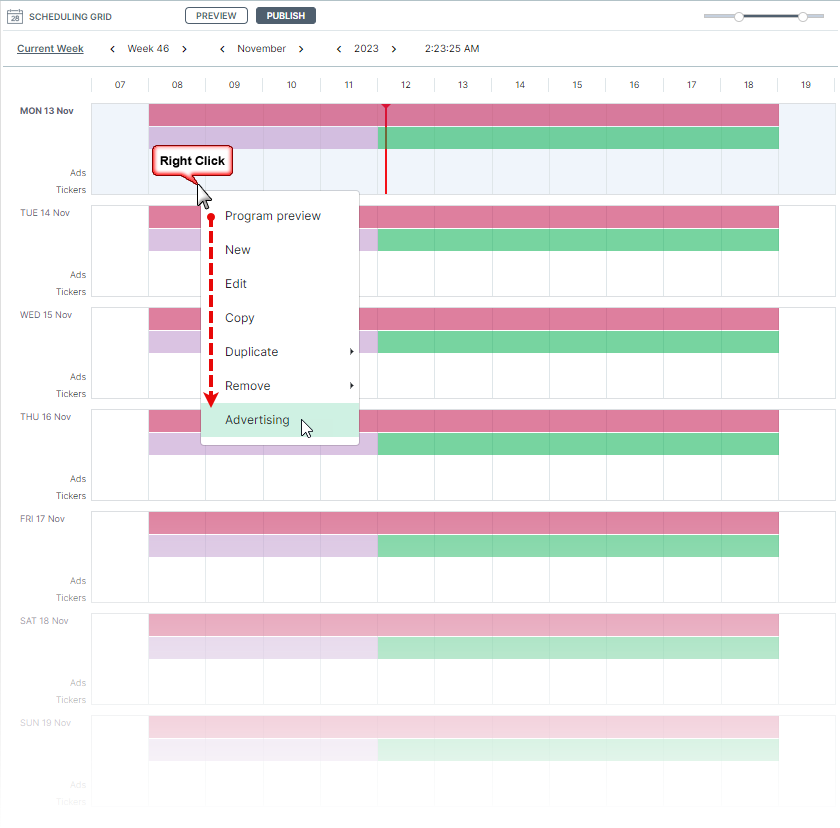
The Scheduling Grid pop up menu
Right click on any free (white) space in the grid to reveal the pop up menu.
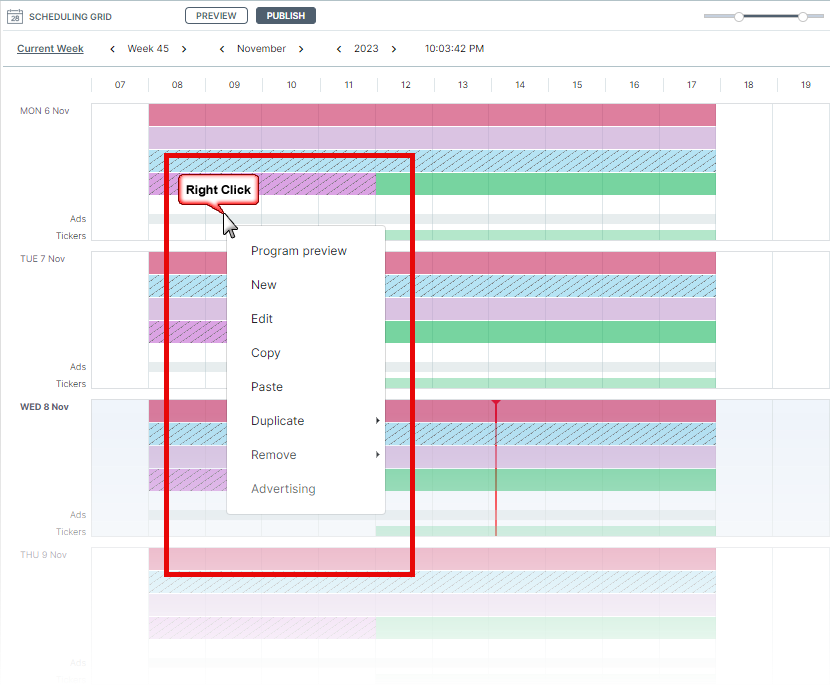
Here are the options available:
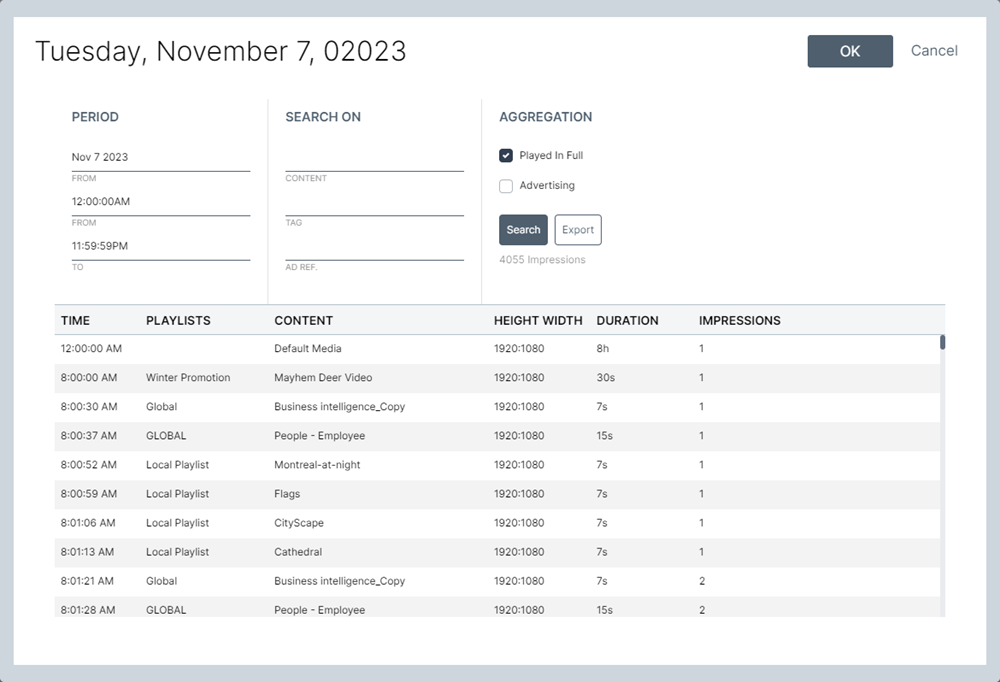
Program preview
Same a clicking the Preview button at the top of the grid. Opens the Preview window so you can perform forward looking reports.
New
Opens the playlist window for the current day so you can add a new playlist by entering its information instead of dragging over a playlist.
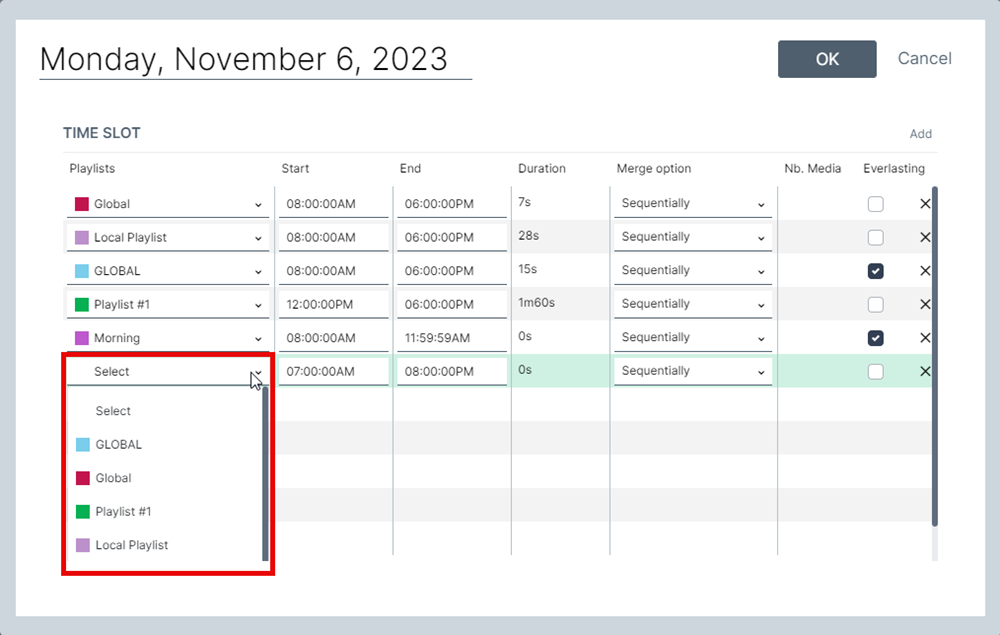
Edit
Lets you edit the time slots for the selected day. 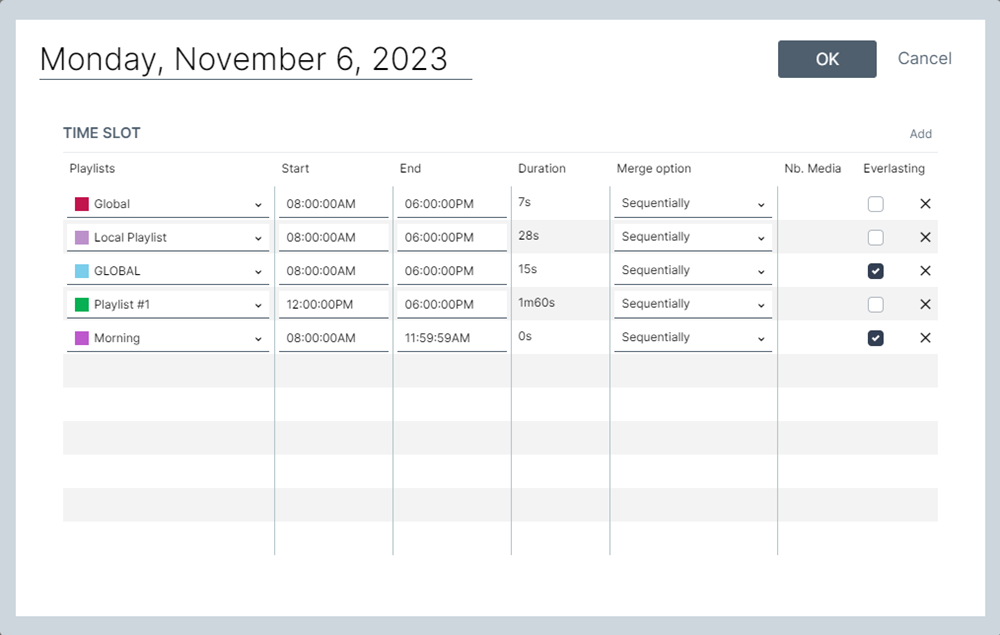
Copy
Lets you copy individual time slots or all the day’s programming to the clipboard depending on where you right-clicked.
Paste
Pastes the previously copied time slots.
Duplicate
3 options available:
- Current Day
- Current Week
- Between Group
Duplicate > Current Day
This option will let you duplicate the day’s programming over a number of days.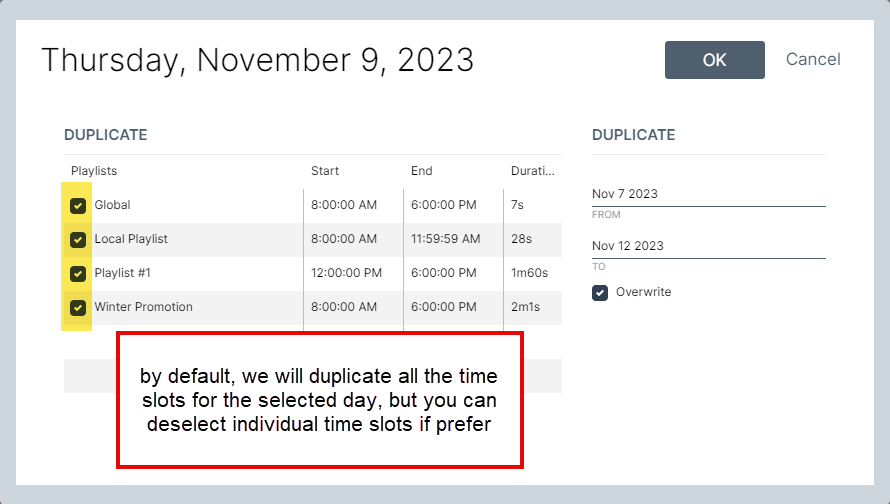
Duplicate > Current Day: Opens the Duplicate current day window where you can select the number of days you wish to replicate the current day’s programming. The left table shows all the time slots for the selected day. All time slots are selected by default. Deselect the ones you don’t want to duplicate forward. On the right, select the number of days to duplicate for. By default, the currently selected day will be the starting (FROM) date. Select the end date (TO) by clicking the calendar icon or type the date manually.
The Overwrite option will be selected by default. This means all existing programming during the selected days will be replaced by the current program. Deselect this option if you want to merge the day’s time-slots with any existing programs but if you do so, the current day’s programming may overlap existing time-slots. Click Save to confirm or Cancel to exit.
Duplicate > Current Week
This option lets you duplicate an entire week of programming for a given number of weeks.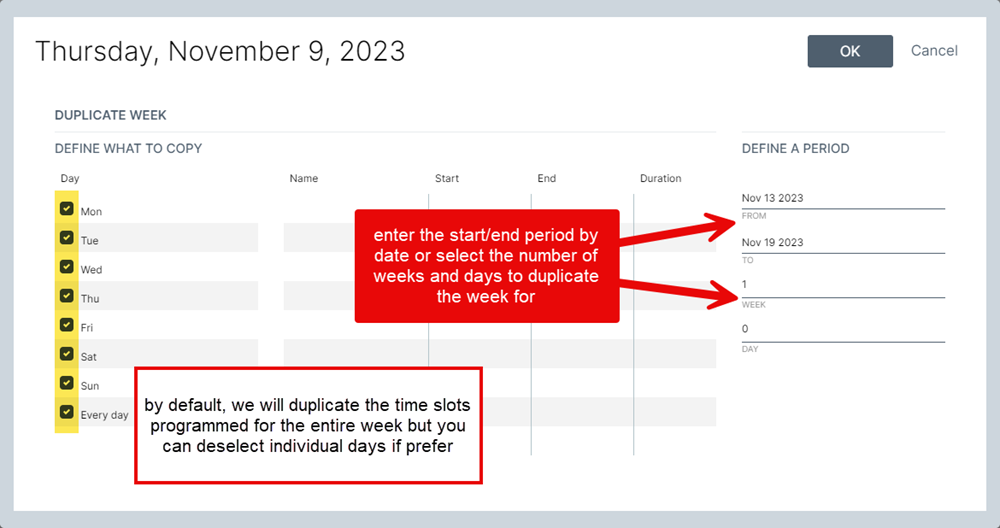
Duplicate > Current Week: Opens the Duplicate current week window where you can select the number of days and weeks you wish to replicate the current week’s programming.The left table shows all the days in the selected day. Every day of the current week is selected by default. Deselect the ones you don’t want to duplicate forward. On the right, select the number of days and weeks to duplicate for. By default, the currently selected day will be the starting (FROM) date. Select the end date (TO) by clicking the calendar icon or type the date manually. You can also use the Week and Day fields to enter this end date information. When you do so, the period to duplicate will be calculated starting from the FROM date.
All existing programming during the selected days will be replaced by the current program. Click Save to confirm or Cancel to exit.
Duplicate > Between Group
This option lets you duplicate your daily programming from one group to another.
IMPORTANT! This feature will duplicate all the playlists and content related to the selected day's program (time slots) from one group to the other. Tickers will NOT be duplicated.
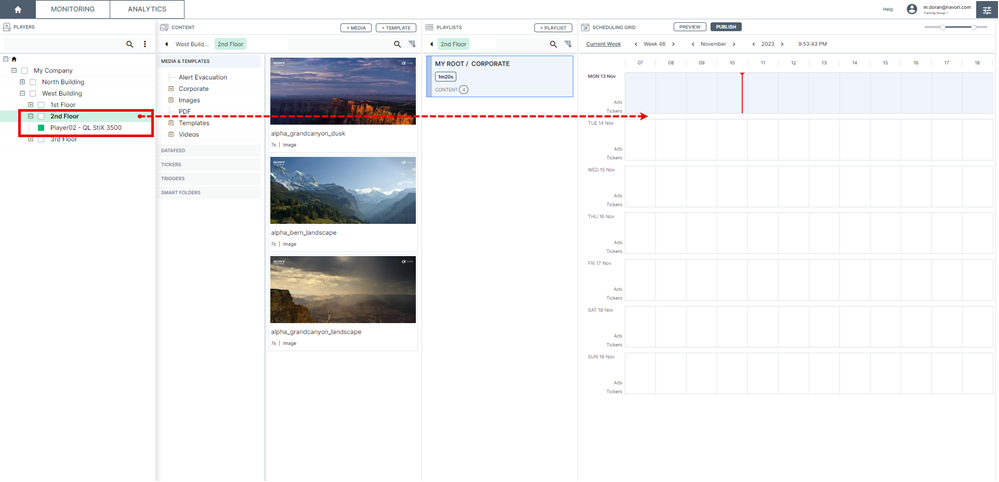
In this example, we have a schedule programmed for our 1st Floor group that we want to copy to our 2nd Floor group
The first step is to right-click on the day with the programming you wish to copy over and select Duplicate > Between Group
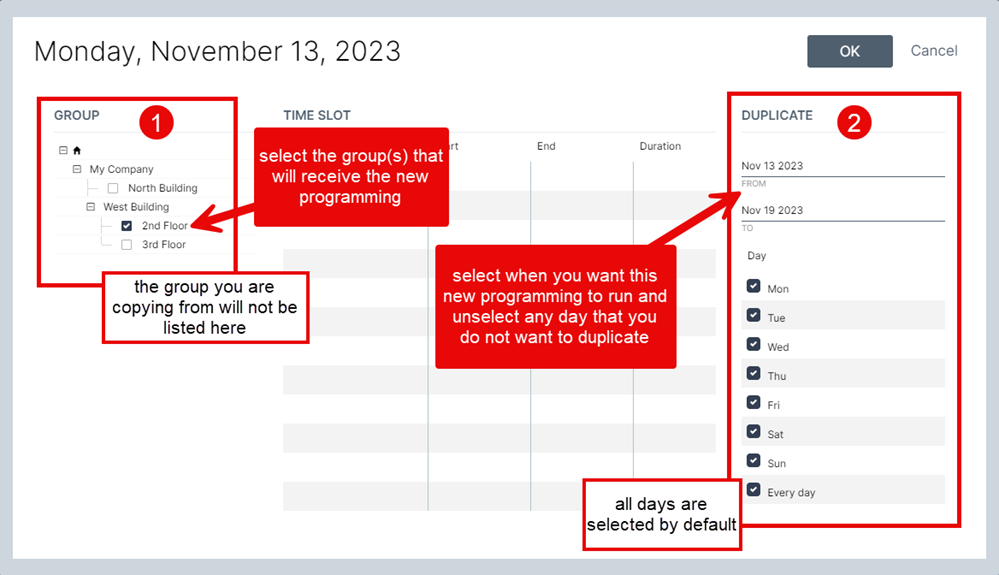
In this example, we will be copying the programming from 1st Floor group to the 2nd Floor group.
The following window will appear.
Here is the 2nd Floor group before receiving the new programming from the 1st Floor group. Notice we see a single global playlist and there is no programming in the scheduling grid.
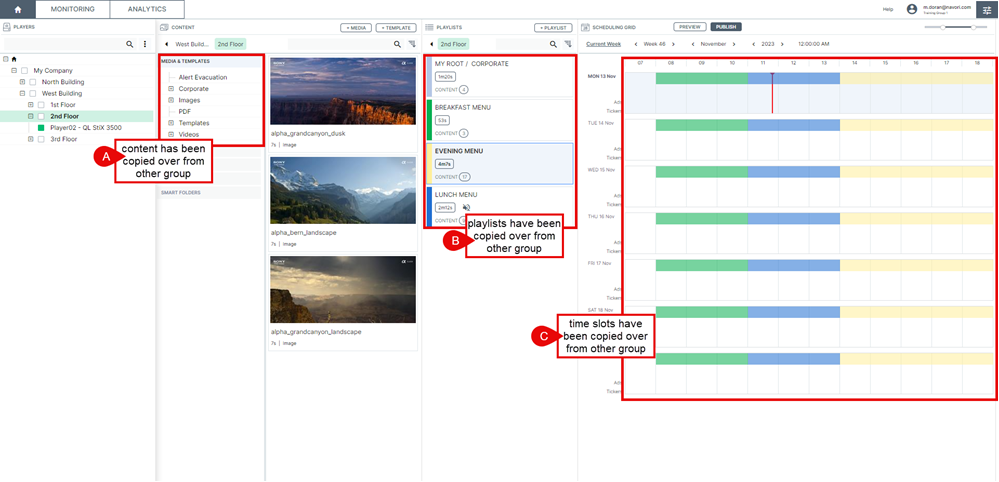
Here is the 2nd Floor group after receiving the new programming from the 1st Floor group. Notice the new content, playlists and time slots that are now copied over from the other group.
Remove
3 options available.
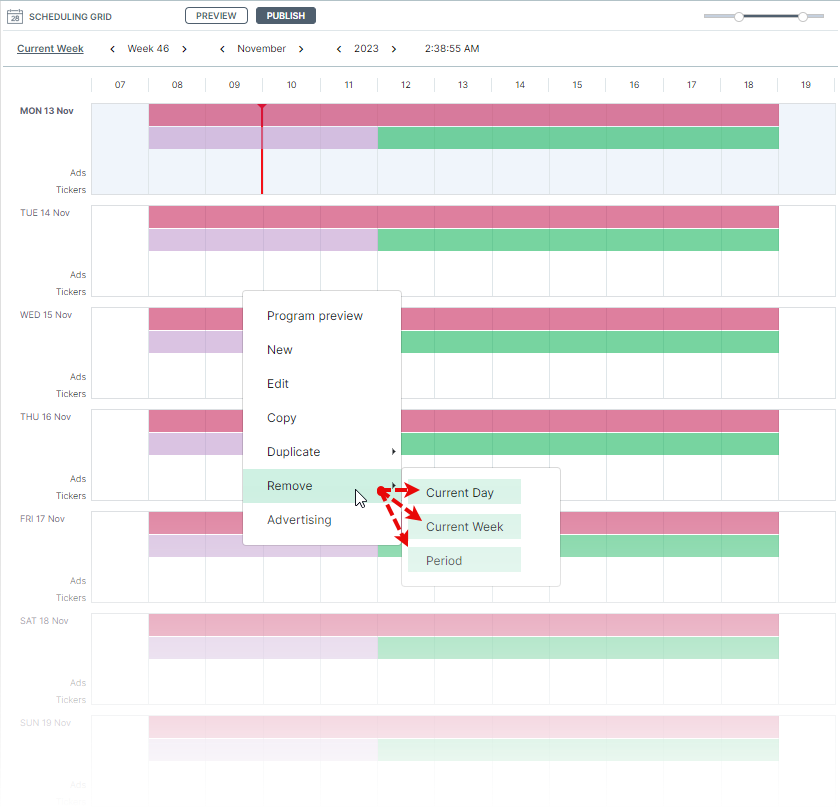
- Current Day deletes all programming for the day.
- Current Week deletes all programming for the entire week.
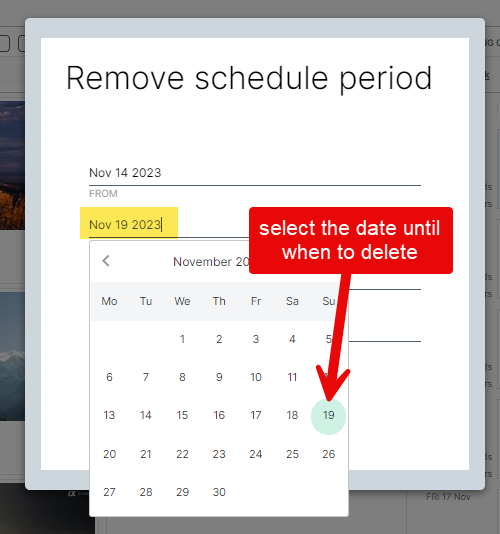
- Period lets you select the number of days to delete programming from. Enter the start and end date/time to clear the programming for.
Paste: Is used in conjunction with the Copy command, to paste any copied programming currently on the clipboard.
Advertising: Opens the Advertising playlist window.
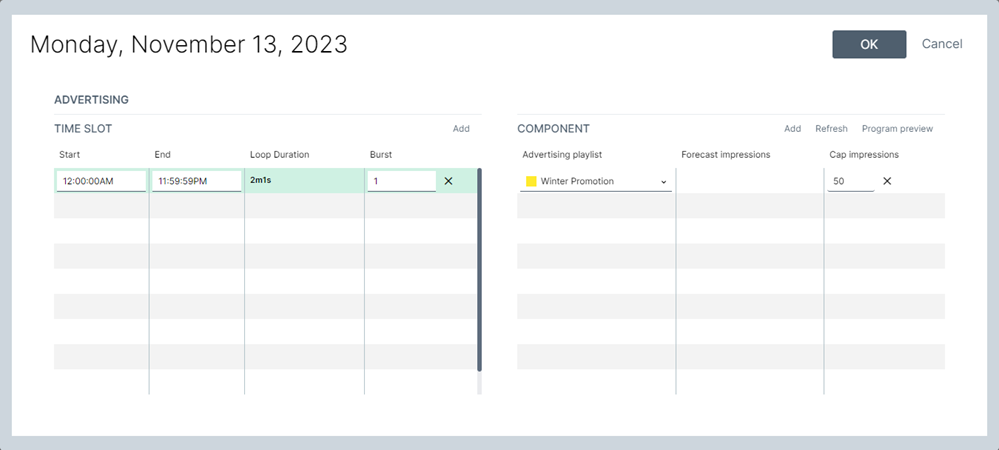
Click here for more information about creating and scheduling Advertising Playlists.