Player Technical Profile on QL Cloud
QL Server Cloud customers can modify the following player technical profile settings:
*NOTE: Player Technical Profiles are only accessible to full administrator accounts. A regular user account with an administrator user profile can't access or modify these settings.
Click here for the Technical Profile video tutorial.
Click here for the Player Management video tutorial.
To access the Player Technical Profile:
- Move your cursor to the Main Menu icon in the upper right corner of the screen.
- Slide your cursor down to the Player Management option.
- Slide your cursor over and click the Technical Profile option.

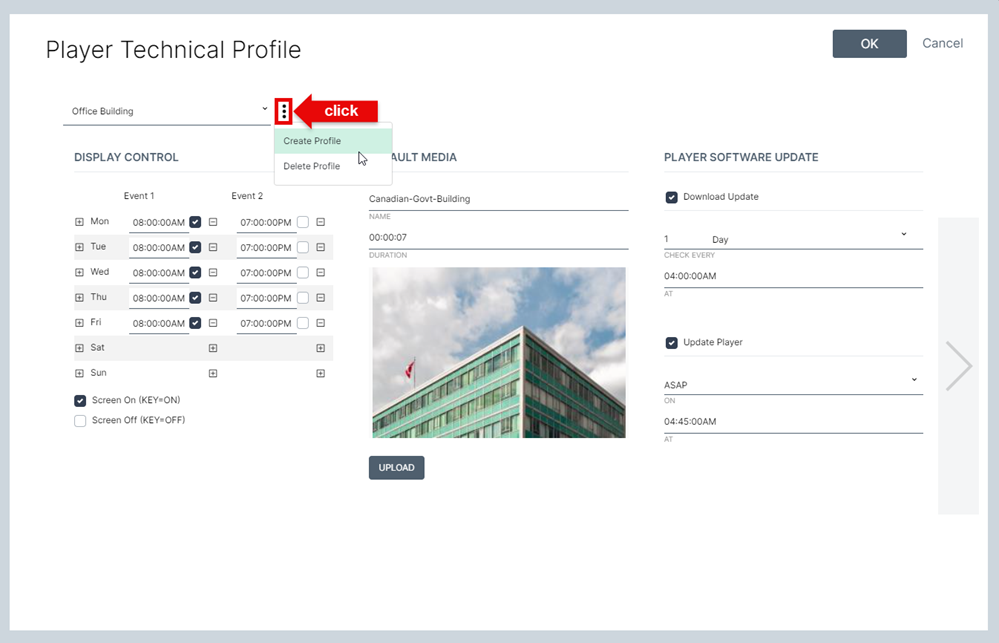
Select, create or delete a technical profile
- Click on the pull down menu to select from any previously created technical profile.
- Click the Options icon to the right of the pull down menu to create a new profile, or delete the currently selected profile.
NOTE: There will always be one default profile for all QL software installations. This profile can be modified or authorized users can create new profiles as required.
Screen 1
The first screen is where you can modify the following settings:
- Select the Technical Profile to access.
- Access / modify the display on/off schedule.
- Upload a new default media image. This image will be shown when there are no playlists scheduled on your players.
- Activate and schedule the player's software updates.
QL Player Update Options
The automated software update system is based on two settings.
The top settings relate to the software update file download.
- To enable this option, select the Download Update check-box.
- Next, select the software update verification frequency (every X day, week or month), and select at what time you want to perform the event.
This is the interval at which the player will ping your QL Server to see if there is a new version to download.
The bottom settings relate to the software update process.
- To enable this option, select the Update Player check-box.
- Next, select the day of the week when you want to perform the software update, and select at what time you want to perform the event.
NOTE (1): Selecting the ASAP option will force the update on the current day, as soon as possible.
NOTE (2): In order for this process to work, you must select a day/time during which the displays are not in a suspended state (as per Display Control).
If your screens are disabled, the update will not happen.
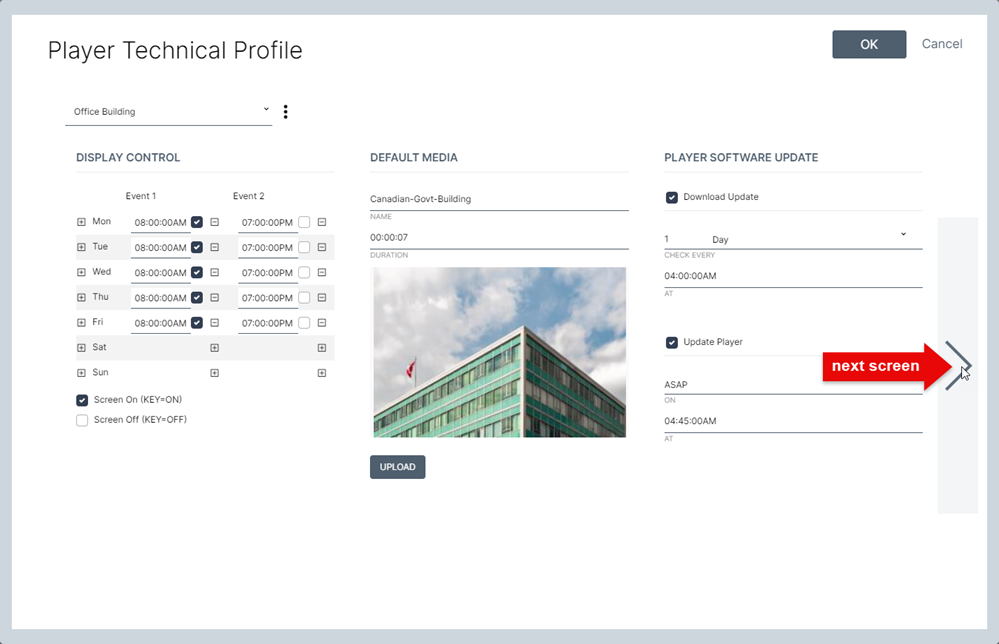
- Clicking the right arrow will switch to the next screen.
Screen 2
The second screen hosts the following settings:
- Select the Synchronize Clock if you want your players to sync their internal clock with the server's time.
- Configure the player reboot time (not optional).
- Activate and configure unused content purge.
- Set the interval at which the analytics reports are generated. The default is every hour and Navori recommends only modifying this setting if advised by a support technician.
- Set the player content storage threshold for O.S. and Content folders.
- Activate and configure the daily auto-publish feature:
- Set the days of programming each player will store locally. The default is 20 days.
NOTE: If the player isn't updated within this range, the screen will display the default media, even if there is additional content programmed in your schedules.
To prevent this, you can either increase the number of days of programming to store, or you can enable auto-publish (recommended). - To enable the daily auto-publish event:
- Select the Enable check-box.
- Select the time at which you want the player to receive an auto-publish. This will be a daily or nightly event.
- Select the update tolerance (expressed in hours:minutes).
This is in case there is another activity scheduled at the same time as the auto-update event (like a programmed player reboot for example).
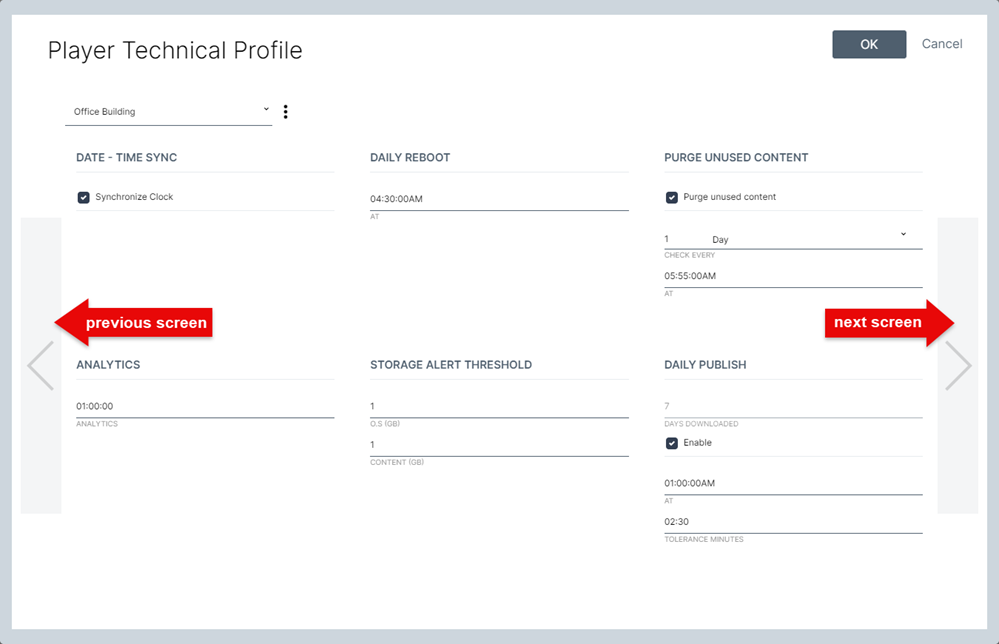
- Clicking the left arrow will switch to the previous screen.
- Clicking the right arrow will switch to the next screen.
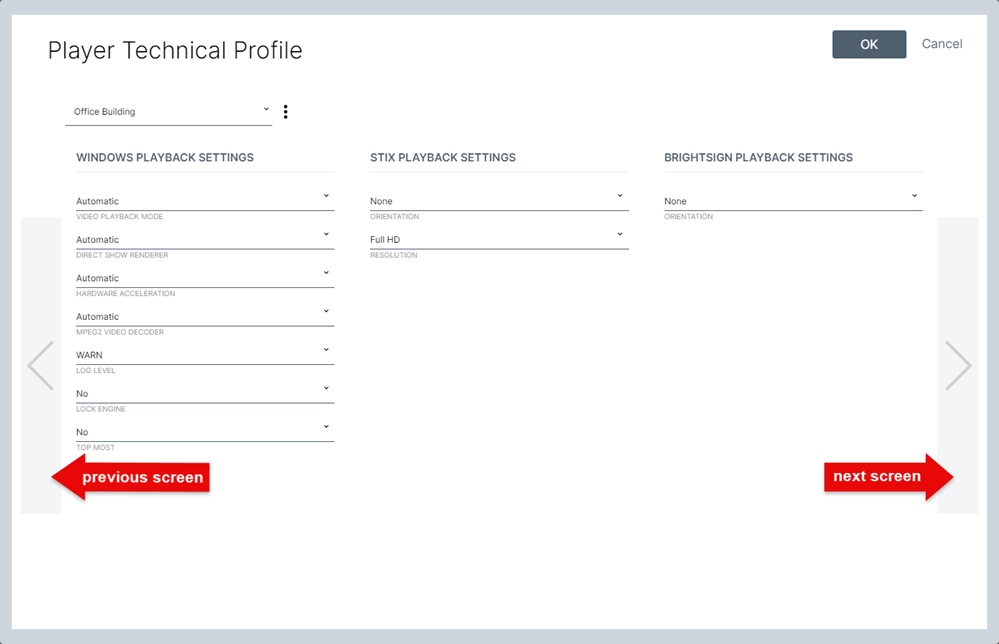
Screen 3
The third screen is where you configure additional playback settings for Microsoft Windows, Navori Stix and BrightSign media players.
Windows Playback Settings
These settings can be used optimize performance and resolve potential issues on Windows based player hardware.
We recommend leaving these settings at the default values unless advised by Navori technical support.
Navori Stix Playback Settings
- ORIENTATION
- Lets you set your Navori Stix screen orientation remotely.
- Options are: None, landscape, portrait, landscape reversed, portrait reversed.
- NOTE for Navori Stix 3500 users: The option "Show the rotation button in the statusbar" must be selected in the device's Android Display Settings for this to work.
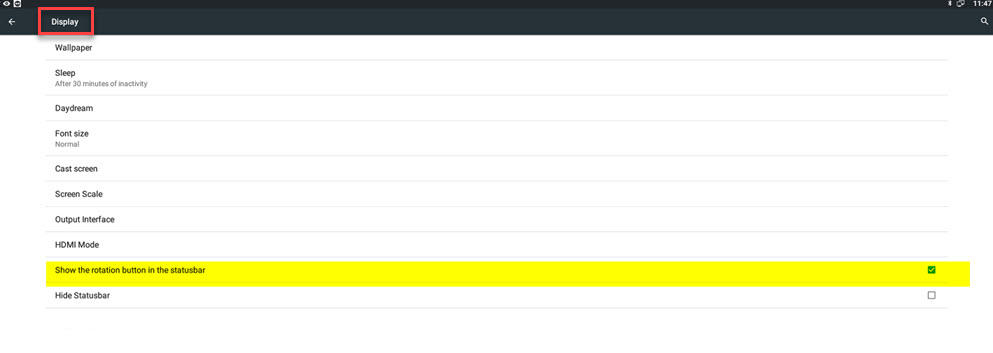
Navori Stix 3700 players are not affected as they have this option selected by default. - RESOLUTION
- Lets you set the media player's screen resolution remotely.
- Options are: Full HD (default setting) and 4K.
BrightSign Playback Settings
- ORIENTATION
- Lets you set your Navori Stix screen orientation remotely.
- Options are: None, landscape, portrait.
**IMPORTANT**: Whenever you modify a player technical profile that is currently in-use, you must publish an update to the affected players. Otherwise the changes won't be sent to the devices.
- Clicking the left arrow will switch to the previous screen.
- Clicking the right arrow will switch to the next screen.
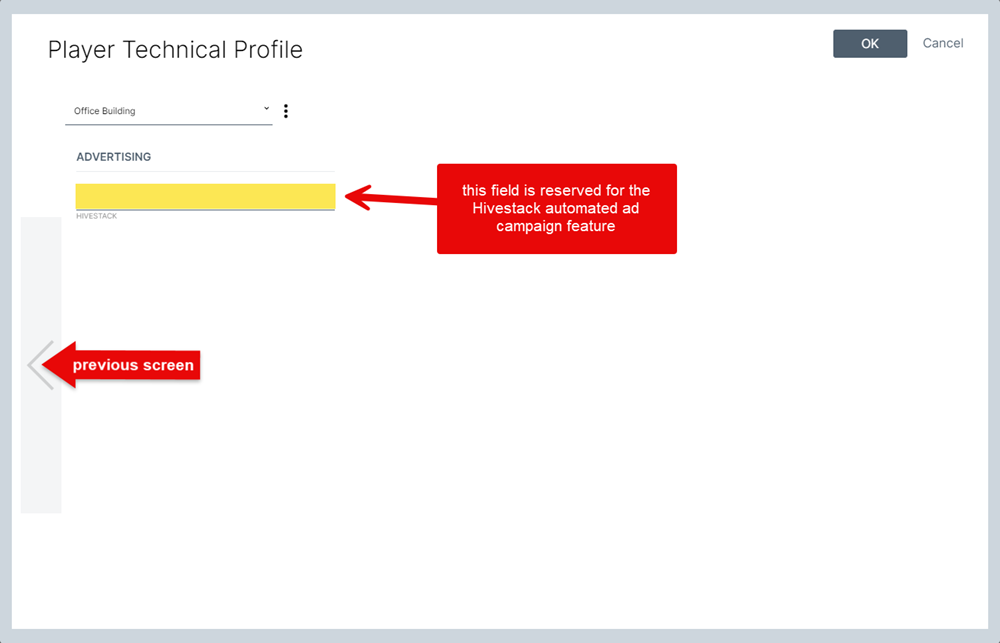
Screen 4
The ADVERTISING / HIVESTACK field is reserved for the software's automated ad campaign feature. Click here to read more about this feature.
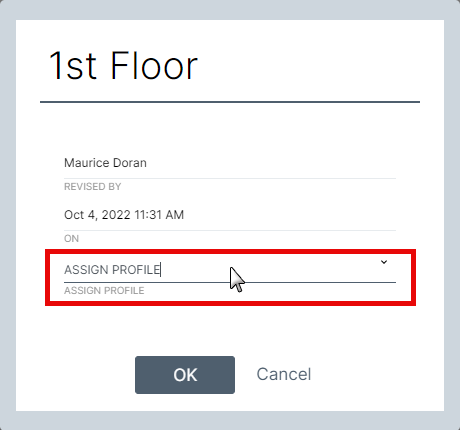
Assigning Technical Profiles to an entire group of players:
To assign a technical profile to an entire group of players simultaneously, double-click the group name (or right-click and select Edit), then select the profile you wish to assign to the players in the group from the Assign Profile drop-down box.