The content approval process
Simple Approvals:
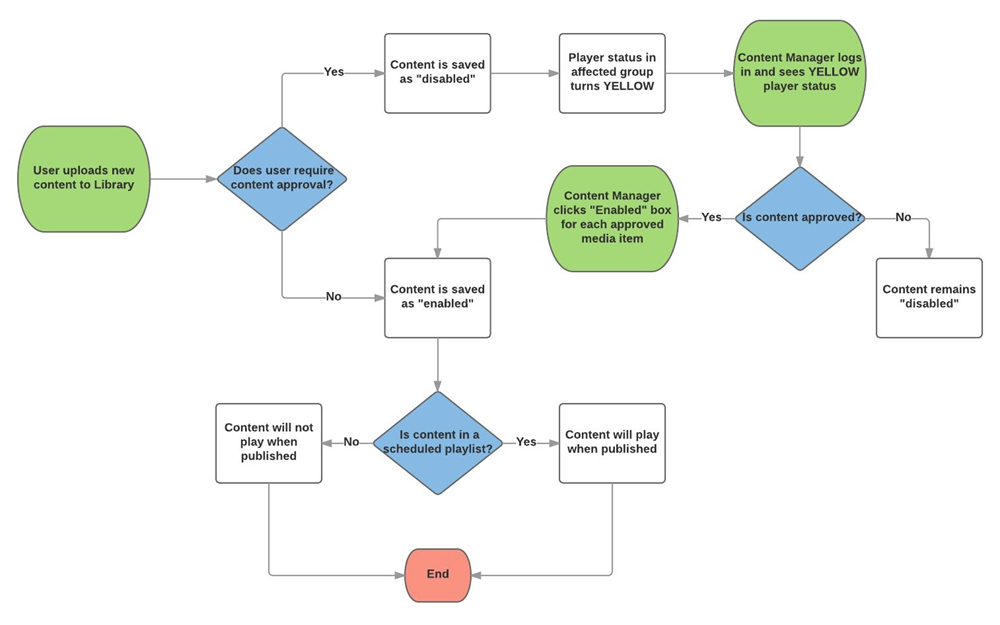
Here is an outline of the Navori QL content approval process (not for Restricted Access Groups).
Step-by-step instructions
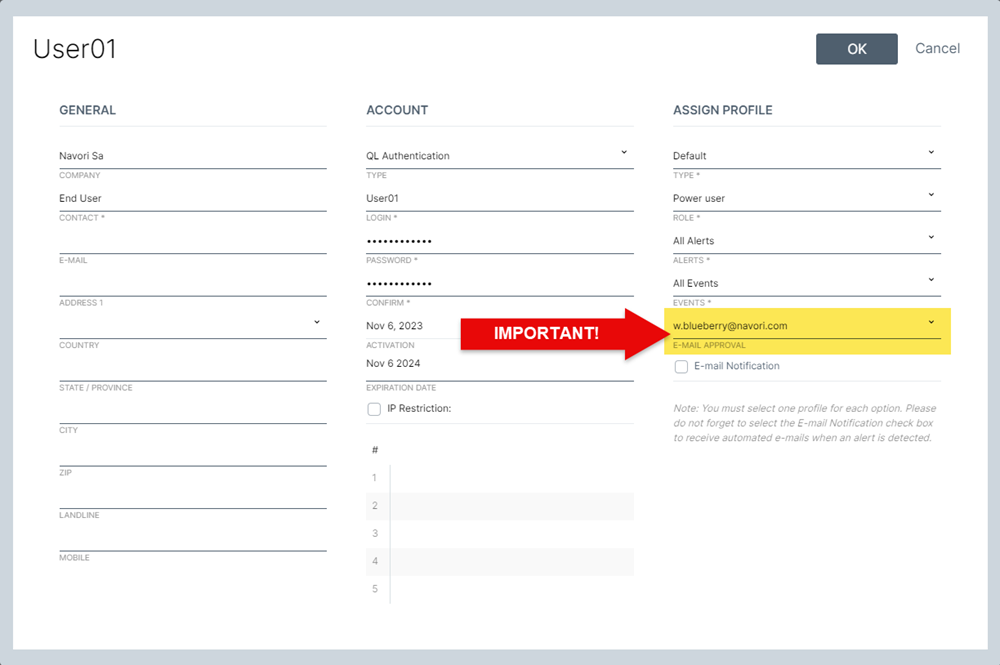
IMPORTANT STEP: You must make sure the user has a role that includes the option Content Approval Required.
This user account MUST also have an email address selected in the Email Approval field, otherwise the process will not work.
Users who requires content approval can log in and upload new content, however the content will be disabled (it will be greyed out).
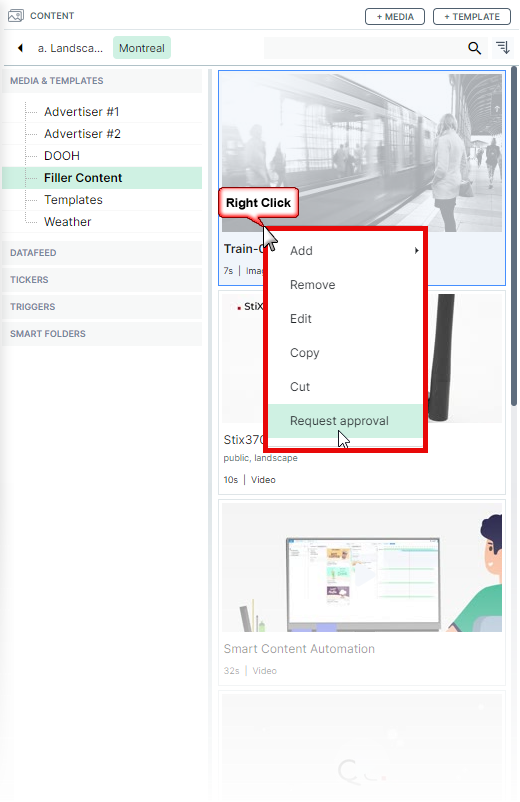
In order to use this content, the user must request approval by right-clicking on the item and select the option Request Approval from the pull-down menu.
The user will be asked to confirm if they want to send out an email with the approval request to the designated person.

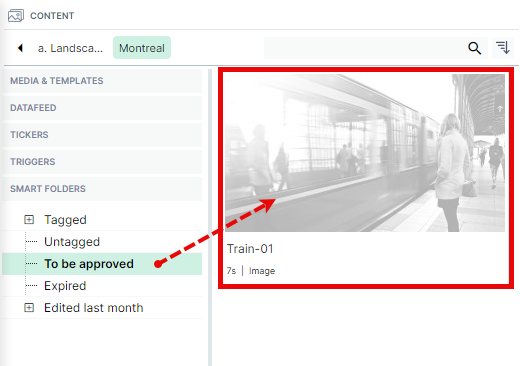
All content pending approval will appear under the To be approved Smart Folder.
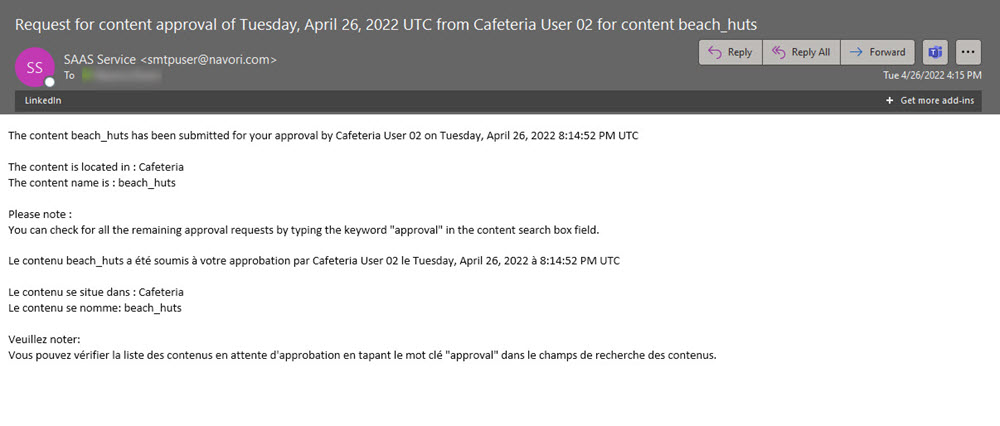
The person in charge of approving content will receive an email as per the example below.
At this point, the approver must log into the Content Manager with their credentials and approve the media by opening its properties and checking the Enabled box..
Approved content will appear normally (no longer greyed out) and can be used in a playlist.
CONTENT APPROVAL USING RESTRICTED ACCESS GROUPS
Users can create protected groups whose sole purpose is to store content that is protected from any changes.
This content must be copied and pasted into a user’s own working groups before it can be assigned to a playlist and shown on screen.
If the user modifies this content in any way, the content becomes disabled and cannot be used until approved by a manager.
The user must request approval before the content can be assigned to a playlist and shown on screen.
This process is described in detail on the Restricted Access Group page.