Domain and User Management
Click here for the Administrative features tutorial video.
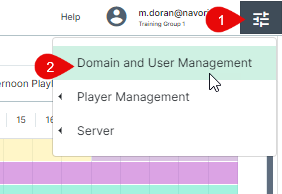
Domain and User Management is the first option in the main menu.
Administrators create domains to grant or deny access to groups and sub-groups under their control.
Once a domain has been created, the administrator will create users in each domain, effectively controlling which areas of the network these users can see and access.
What are domains?
QL Domains are made of different levels (groups / sub-groups) in the player hierarchy.
Here is the group view in the Domain and User Management window.
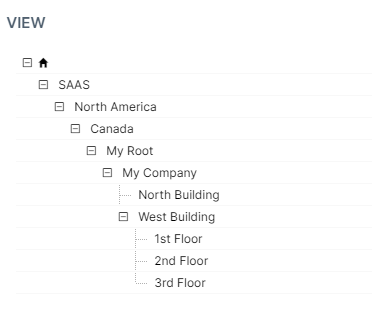
Administrators can create multiple domains from this hierarchy by selecting and saving them individually.
For example, we can create a domain for one of our tenants and include levels My Company > West Building and this domain will let its users access only these two levels. Users assigned to this domain won't be able to see any levels above or below these two levels.
To give access to users in the sub-groups immediately below “West Building”, administrators must also include the sub-groups located below West Building and assign these levels to the domain (in the above example, this would be sub-groups 1st Floor, 2nd Floor, 3rd Floor). Administrators can add or remove selections at any time and changes will come into effect next time the domain users log in.
NOTE: User accounts created at the top (root) level of your Player network will have unrestricted access to the entire hierarchy. This is useful for administrator and other high-level users who need access to every levels. Click here for additional information and best practices for root/domain level administrator and accounts.
Domains are great for managing multi-tenant networks or simply to restrict access to various parts of your network.
Domain and User Management window overview
The Domain and User Management window is split into 3 areas:
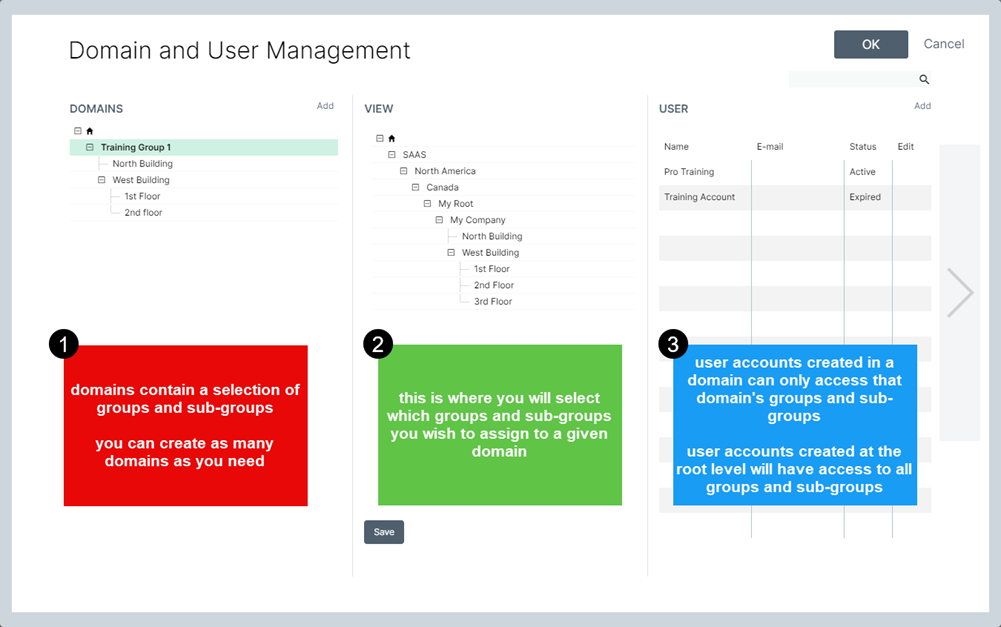
- The Domain list. This is where you browse the list of available domains and create new domains.
Domains can contain sub-domains. Click the down-arrow to show sub-levels.
- The Group / Sub-Group View. This is where you browse the group and sub-group levels. Click the down-arrow to show sub-levels.
You can select levels to be included or excluded from the selected domain in this section.
- The QL User list. This table shows the list of users assigned to the selected domain. You create new user accounts in this section.
Creating your first domain
Before you create a domain, you must first configure your group and sub-groups. Remember that groups and sub-groups are created and managed in the Players window. You can't create them in the Domain and User Management window so if you're missing something, now's the time to close this window, create the missing levels in the Players window and return when you are done.
It's important to create a hierarchy that reflects your intended use, like your player network’s physical layout or your corporate structure. This will make navigation more intuitive for your users and simplify content and scheduling management going forward.
Next, consider which level (or levels) you need based on your users responsibilities, physical locations or other relevant criteria. For example, you may want to create a domain that regroups your offices in a particular country, state or province. You could also create a domain for your corporate offices and another for your manufacturing locations or create domains based on the brands you manage.
As a rule, it's always best to map out your domains the same way you do your groups and sub-groups to eliminate any confusion as your network grows and staff turns over.
FOLLOW THESE STEPS:
- Click the Main Menu button in the upper right corner of your screen to access the main menu. Next, select Domain and User Management.
- The Domain and User Management window will open. When you begin, you will see the root level. If you assign users to this level, they will each have access to the entire group/sub-group structure that you created. These users’ view will automatically update when you add or remove levels. User accounts created assigned to the root cannot be excluded from any level. They always have an unrestricted view of the network.
You must create domains under your root level to restrict user access to specific levels. To do so, right-click on the root level and select Add or click the Add button above.
(NOTE: The root level always appears under the "house" symbol.)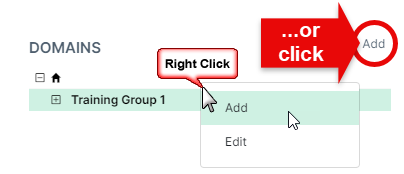
- This will open the new domain window. Type in a domain name and click OK to confirm.
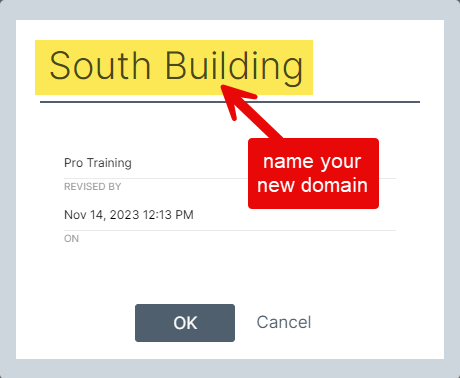
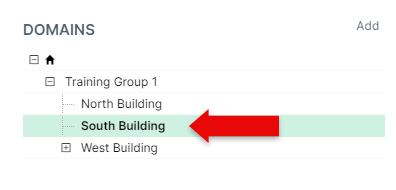
- The domain will be added under the root. Click the down-arrow to unfold the list and you will see your new domain.
Assigning levels to a new domain
By default, new domains have no levels. They are basically empty so you must select which levels to include in each new domain.
TO ASSIGN GROUP/SUB-GROUP LEVELS AND USERS TO A NEW DOMAIN:
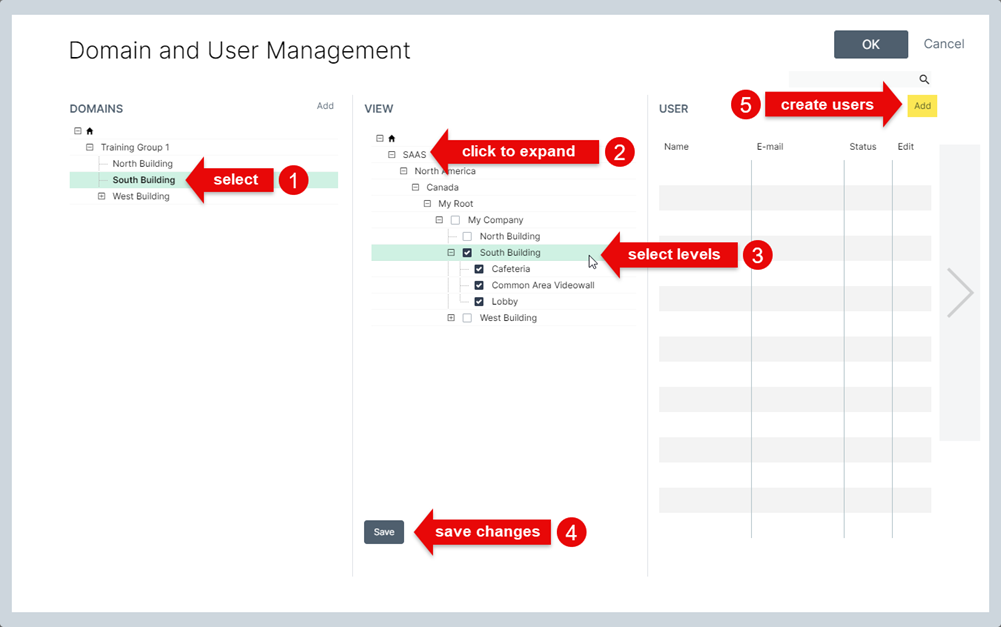
- Click the new domain name in the DOMAINS section to select it.
- Click on the down-arrow left of each level name (group/sub-group) to unfold each level you want to see.
- Click the check-box for each level you want to assign to the currently selected domain.
- Click Save to confirm your selections and update your domain.
- Click Add in the USER section to create new user accounts. These accounts will be assigned to the currently selected domain.
You can add as many user accounts as required and when you are done, click OK to confirm your changes.
NOTE: You will need to enter your administrator password after this step otherwise the user account will not be created.