Creating user accounts
Click here for the Administrative features tutorial video.
User accounts are specific to each domain.
Start by opening the Domain and User Management window, then follow these steps:
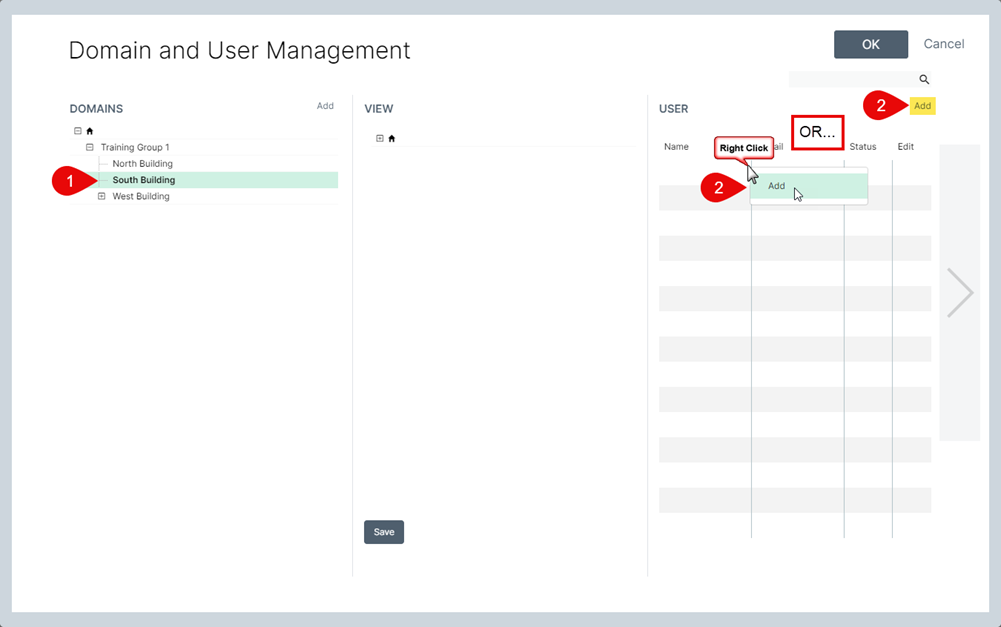
- Click on the domain, or sub-domain where you wish to create the new user account.
- Right-click in the USER table and select Add, or click Add above the USER table.
In both cases, the User Account window will open. This is where you enter the user's credentials and assign their profile.
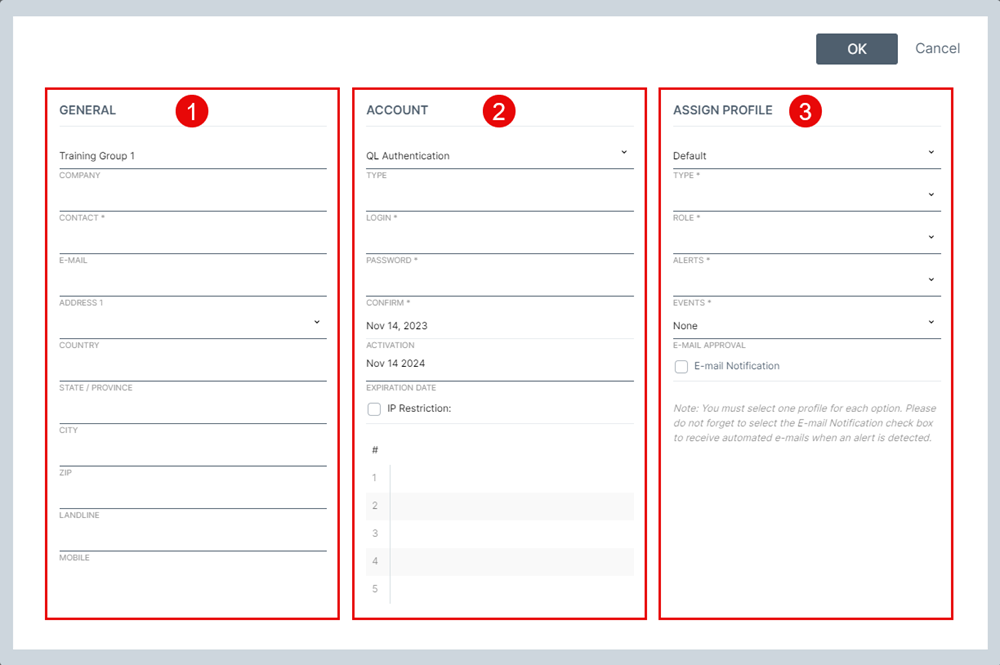
The User Account window has 3 sections:
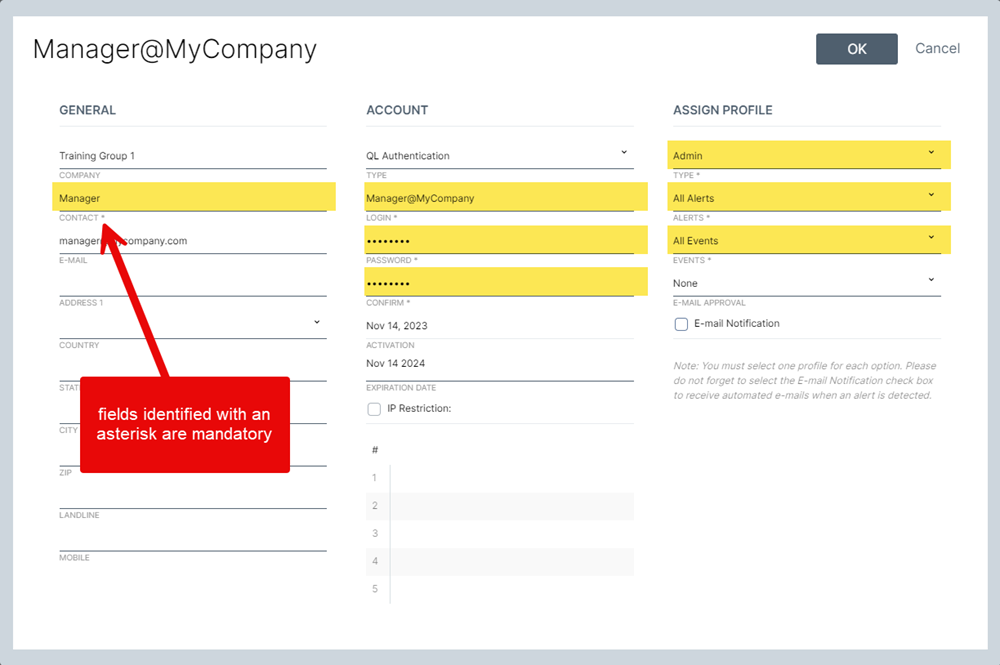
The fields identified with an asterisk are mandatory.
1. GENERAL
This is where you enter the user’s contact information. These fields are all optional (except for the CONTACT field), however it's important to enter an email address in the appropriate field if you want this user to receive automated email notifications.
NOTE: The COMPANY field is automatically filled in and can't be edited. The information in this field is retrieved from the Root Domain name assigned by Navori.
2. ACCOUNT
Account Type: This is where you select the type of notification to use when logging in the user. The default is QL authentication. Options are QL Authentication, Active Directory, SSO (Single Sign-On).
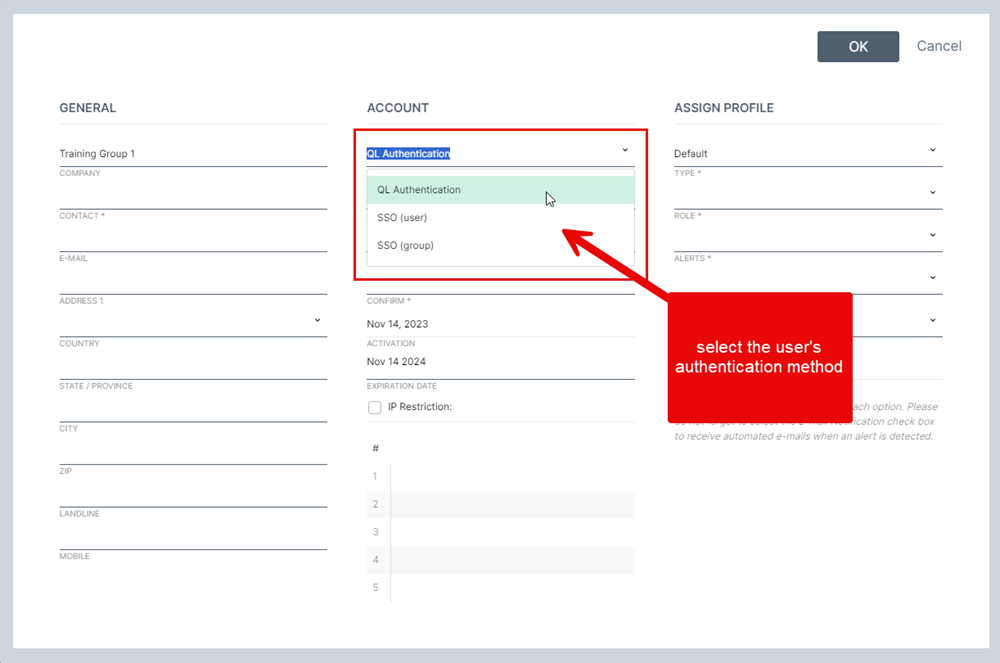
QL authentication means QL server will authenticate the user based on their login name and password as configured in QL.
Active Directory and SSO are reserved for corporate users. When selecting these options, users won’t have to enter a password if they are already logged into AD. Users still require a QL account, but there is no separate password to enter. Only the login name will be required.
Account Login: Enter a login name for the user. Alphanumerical and special characters are supported (for example, name@company.com is a valid user name). IMPORTANT: login names are case-sensitive.
Password and Confirm Password: If QL authentication is selected, enter a password for the new user account and then confirm the password in the next field. Passwords much match.
- Passwords must have 8 or more characters and contain at least one uppercase, one lowercase and one number. Special characters are also supported.
- An error will appear if your password or confirmation fail to meet the requirements.
- IMPORTANT: Passwords are case-sensitive.
Start and Expiration dates: User accounts have a start and expiry dates and all new user accounts expire after one year unless you specify an expiration date.
- To extend the account expiration date, click on the existing date to bring up the calendar and then navigate to the desired expiration date.
- To create a “permanent” account, simply enter a date really far in the future (ex. June 13, 2100).
IP Restriction: IP restriction is used to restrict user logins to a physical location, by entering one or more IP addresses in the fields provided.
- By default, IP restriction is OFF so to turn the feature ON, you must check the option box. Next, you enter each IP address you wish to restrict access from.
- Once this feature is enabled, this user will only be able to login from that IP address.
NOTE: Wildcards are supported (ex. 198.186.0.*). This is so you can restrict access to a network segment and not just a specific IP.
This feature is useful if you want to prevent someone from logging in from outside the company’s office (like, from home).
To let users login from any location, leave this option unchecked.
3. Assign Profile
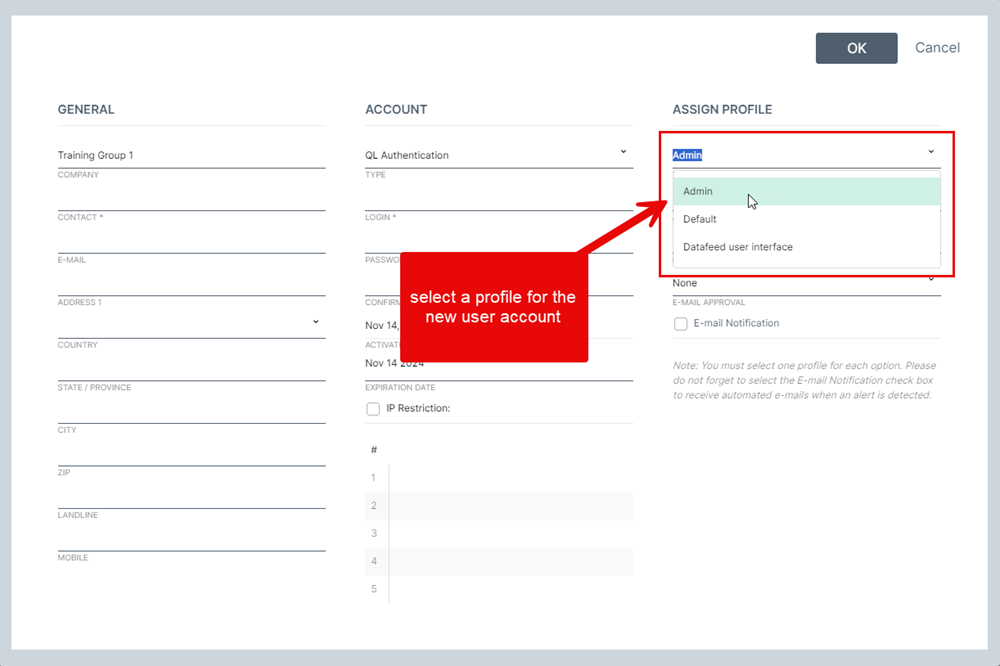
Type: Depending on your user account, the options are: Admin, Default, and Datafeed user interface.
NOTE: Only a full administrator account can access all 3 options. If you are a default user with an admin user role, you won't be able to create a full administrator account.
- Selecting Admin will let you create a full administrator account.
This type of account can access advanced administrative features: - Create and edit domains and users.
- Access the Player technical profile (edit profiles, create new profiles).
- Access the Server properties for SSO configuration.
- Selecting Default will let you create a regular user who has access to the user interface. You can't create a full administrator account.
- You can create a user with an administrator profile but they will not be able to access advanced features.
- They will however be able to create and manage domains and user accounts.
- Selecting Datafeed user interface, will let you create a user that can only access the Data Feed Manager.
- The user will be able to edit any QL Server data feeds to which they have been given access.
- The user won’t be able to access any other QL Content Manager feature (no access to the full user interface so they can't modify scheduling or playlists).
Role: The role menu lets you select from a list of user profiles currently programmed on the server.
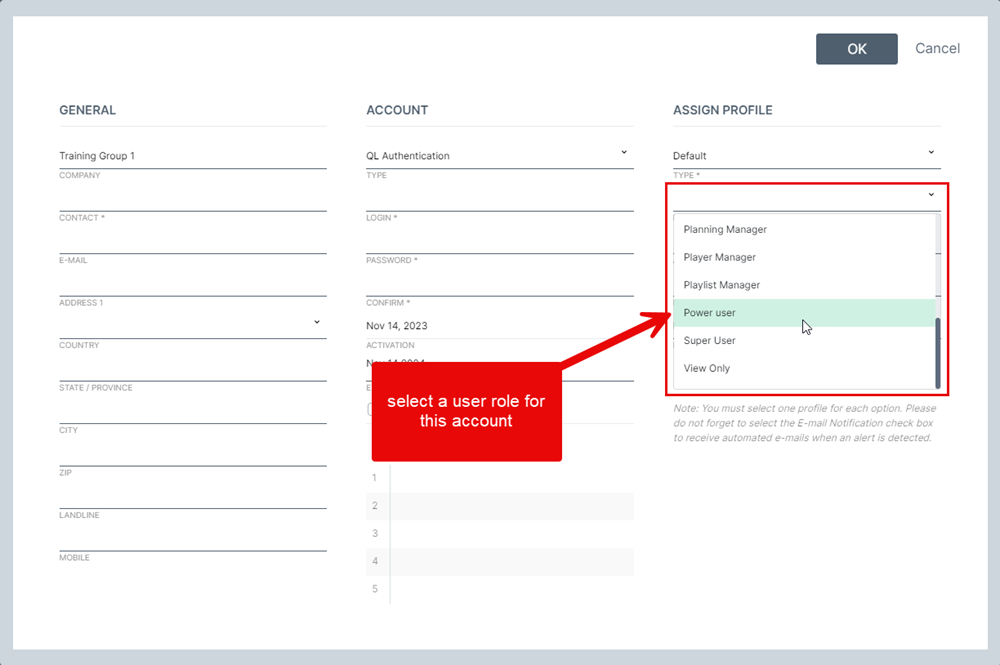
Navori QL Cloud users have access to a series of pre-programmed user roles that control various user rights. These roles are administered by the Navori Labs technical staff.
For example, Admin is an administrator profile that can create other user accounts. End User is a profile you assign to someone who needs to have his/her content approved by another user (someone like a Power User or Content Editor). There are several user profiles available to QL Cloud customers.
Click here to view the complete list of all the user rights assigned to each QL user roles.
NOTE: QL on-premise software administrators can create their own user roles. Click here to find out more.
User Profiles
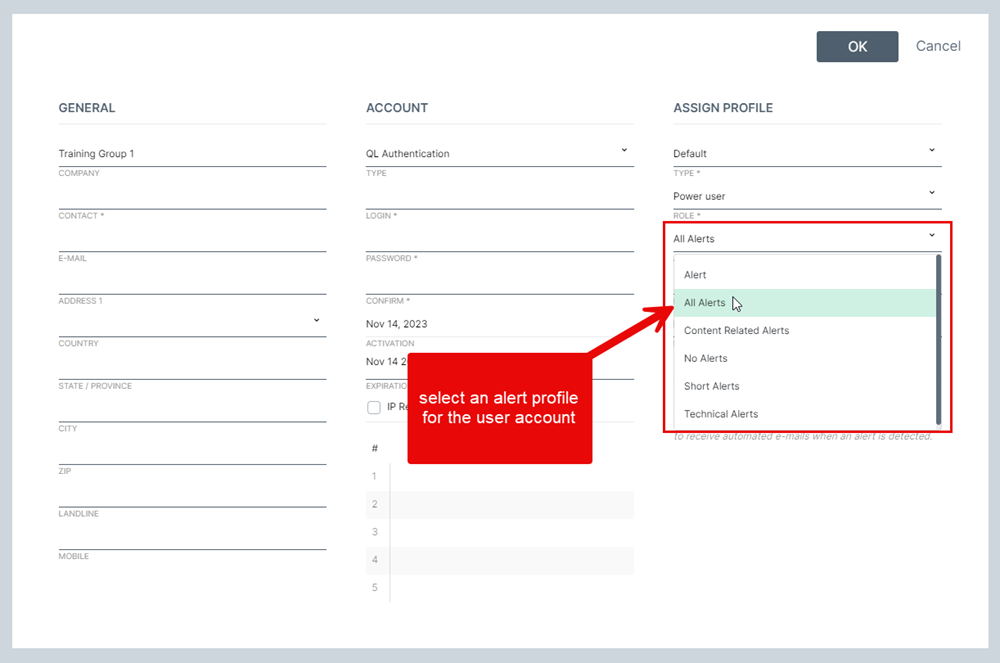
Alerts: The alert profile determines the type of alert information that will be shown in the QL Content Manager UI, and sent out by email (if applicable). QL Cloud users can pick one of the following options: All Alerts, Content Related Alerts, No Alerts, Short Alerts, and Technical Alerts.
For example, users who have the “Content Related Alerts” profile will only see these specific alerts. They won’t be notified of any technical issue.
Users who are assigned the “No Alerts” profile will not receive any notifications.
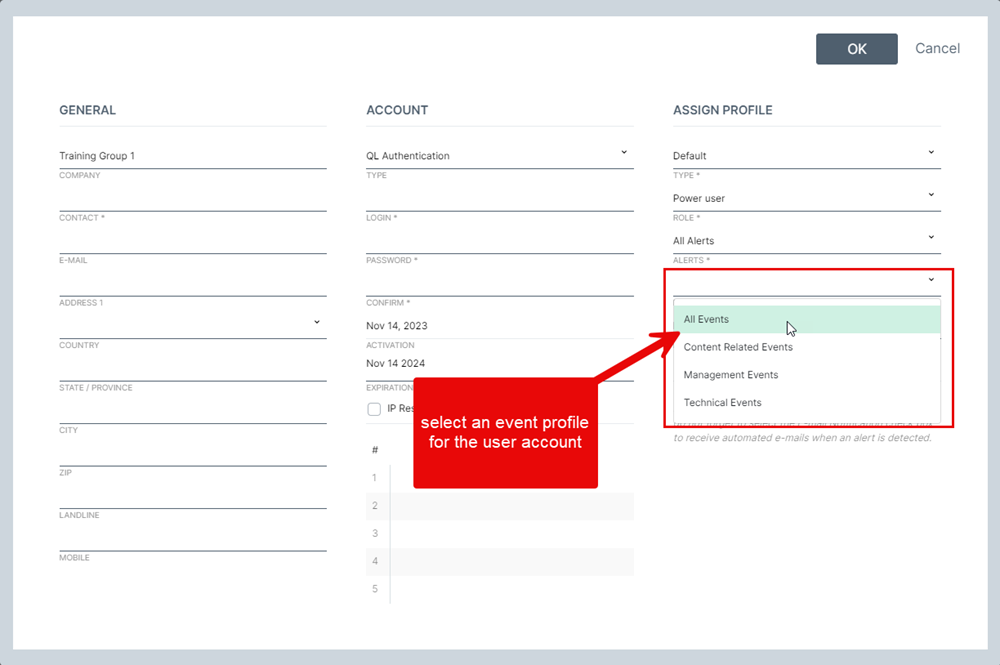
Events: The event profile determines the type of event information that will be shown in the QL Content Manager UI. QL Cloud users can pick one of these options: All Events, Content Related Events, Management Events, and Technical Events. Users who have the “Content Related Events” profile will only see these specific events. They won’t be notified of technical events.
Users who are assigned the "Management Events” profile will be notified when they have content waiting for approval in the Content Library.
NOTE: QL on-premise software administrators can also create their own custom event profiles. Events are only shown in the monitoring details window (accessible by selecting players, clicking Monitoring and then clicking the line representing individual players).
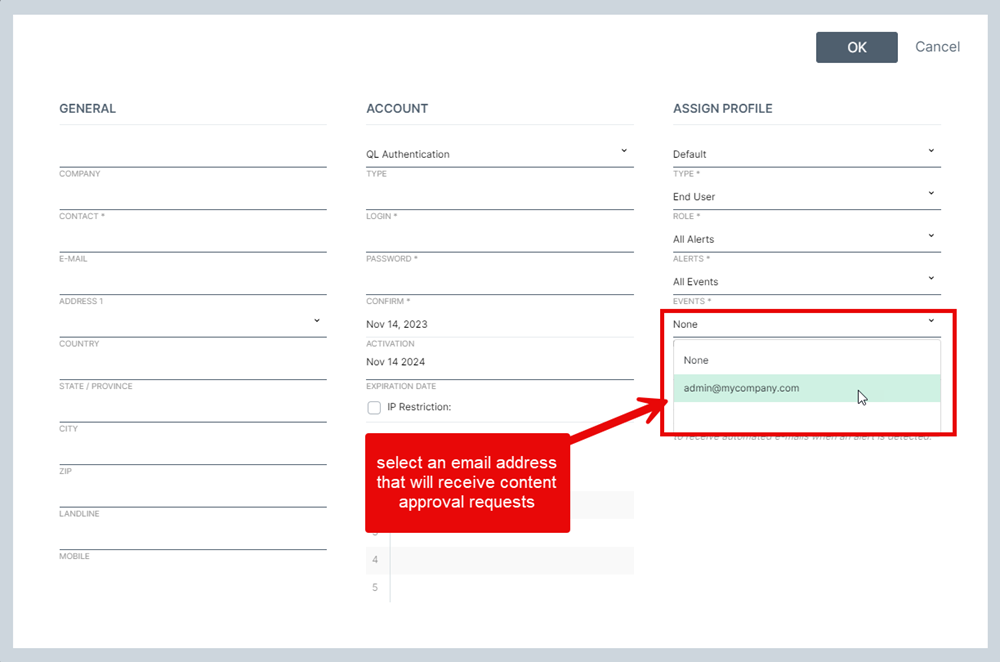
Email approval: Use the pull-down menu to select the email account of a root level user. This is the person who will receive content approval notification requests. This setting is optional.
Email notification: Clicking this option will enable email notifications from QL Server. These are alert messages sent automatically to users know when an issue requires their attention. Note a valid email address must be provided. This setting is optional.
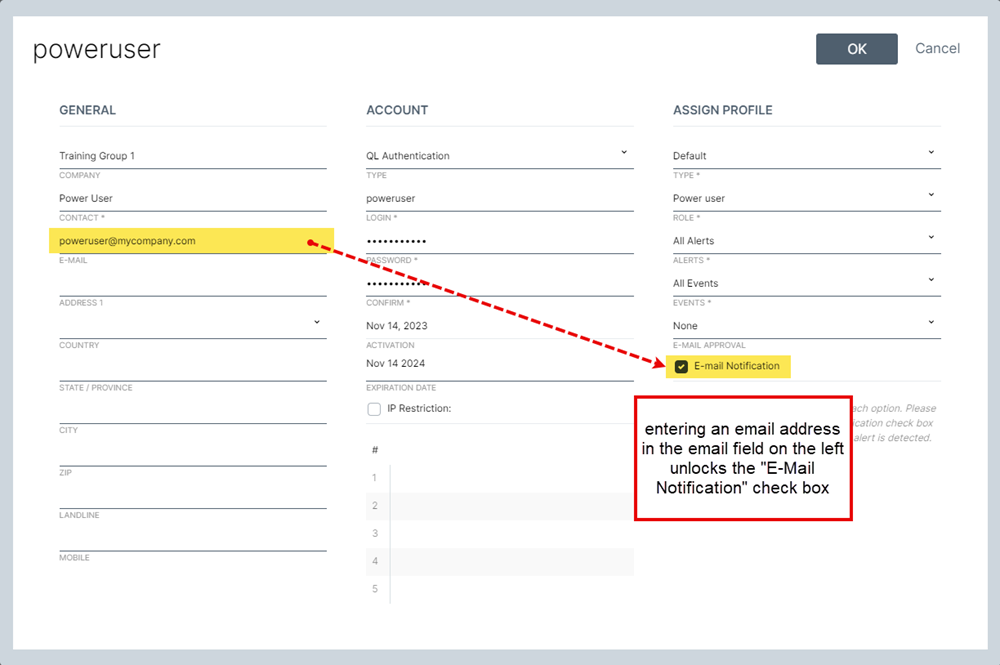
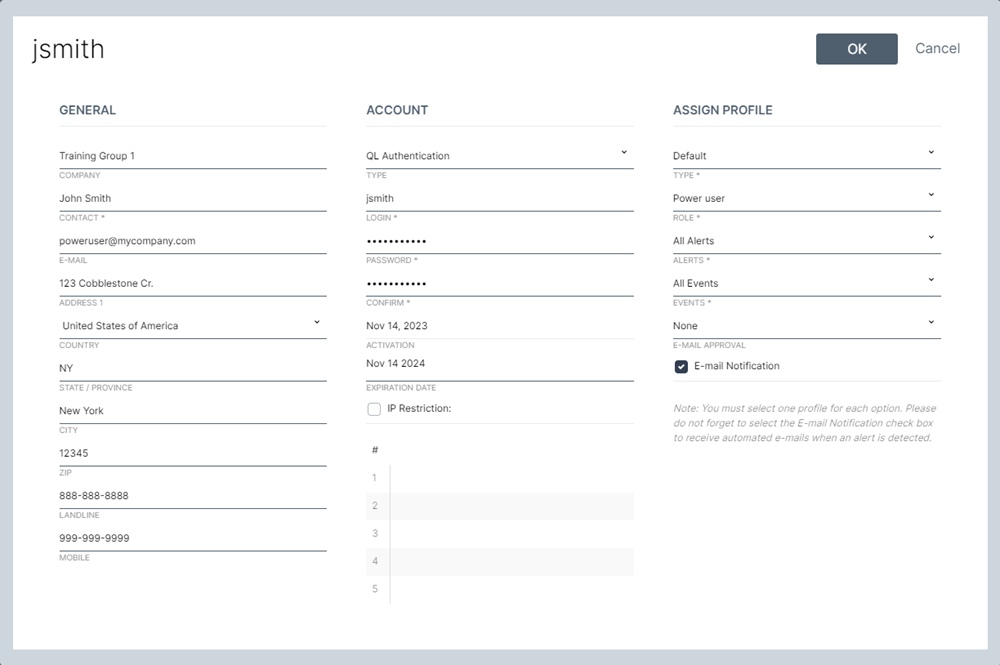
QL user account example:
Here is what a typical user account looks like.