Adding content to the Library
There are 3 ways to upload new media to the Content Library.
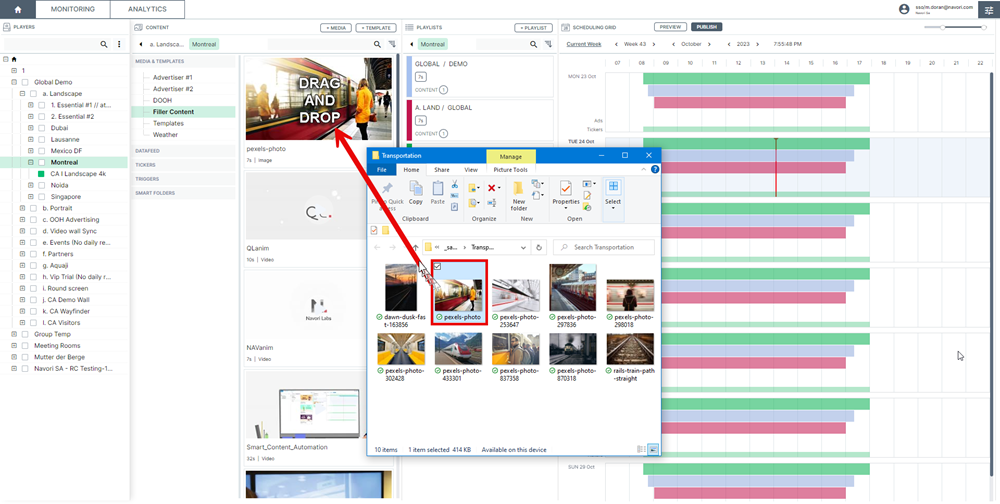
Option 1 - Drag and drop from Windows File Explorer
- Open Windows file explorer and locate the content you wish to upload.
- You may select individual files, use Ctrl+click to select multiple files or use Ctrl+A to select all the files in the folder.
- Drag and drop your file(s) into the Content Library. When multiple files have been selected, you will see the number of files as you drag them over,
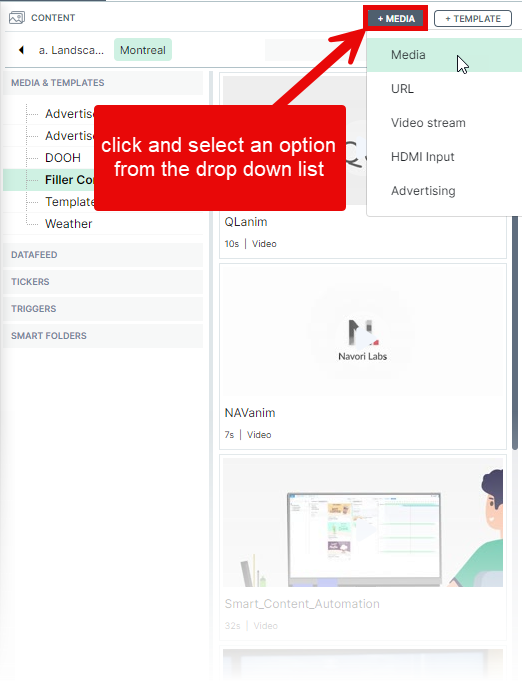
Option 2 - Adding content via the +MEDIA button
- Click the +MEDIA button at the top of the Content Library window.
- Select the type of content you want to add:
- Media: Select a compatible media file (audio file, image, video, PowerPoint, PDF, zip archive* (HTML, HTML5).
- URL: Specify a web page URL (HTML, HTML5).
- Template: Opens the Template Designer.
- Video Stream: Specify a video stream URL.
- HDMI Input (for TV tuners).
*Note about compressed HTML files: QL lets users send web pages (including all required assets such as images, xml, etc) to each player so the data is stored locally. HTML and HTML5 are both supported. Storing this data locally means the content will continue to play even if the player loses its connection to the internet. To use this feature, compress (zip) all of the files required to display the web page and then upload the zip file as media. QL server will unzip the contents and send the files to each player when required.
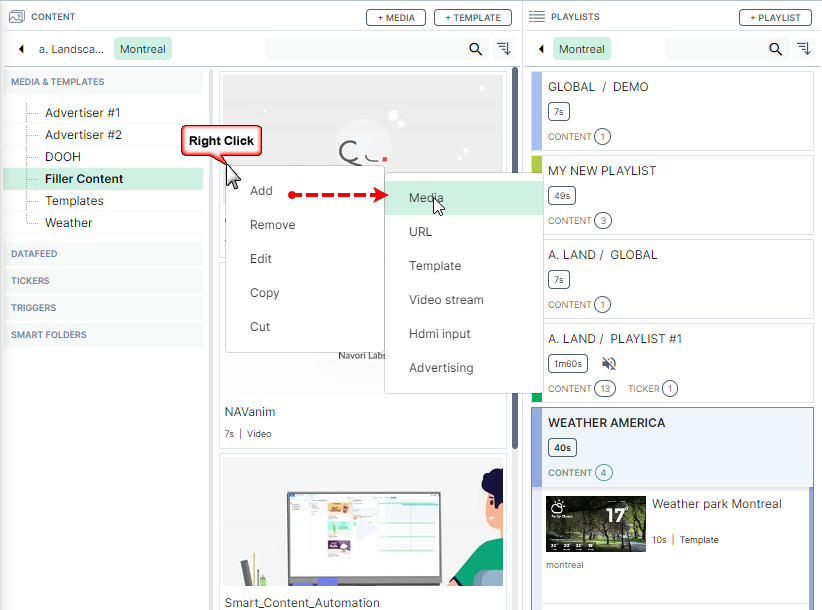
Option 3 - Adding content via the pop-up menu
- Right-click in the Content Library window.
- Select the type of content you want to add:
- Media: Select a compatible media file (audio file, image, video, PowerPoint, PDF, zip archive* (HTML, HTML5).
- URL: Specify a web page URL (HTML, HTML5).
- Template: Opens the Template Designer.
- Video Stream: Specify a video stream URL.
- HDMI Input (for TV tuners).
*Note about compressed HTML files: QL lets users send web pages (including all required assets such as images, xml, etc) to each player so the data is stored locally. HTML and HTML5 are both supported. Storing this data locally means the content will continue to play even if the player loses its connection to the internet. To use this feature, compress (zip) all of the files required to display the web page and then upload the zip file as media. QL server will unzip the contents and send the files to each player when required.
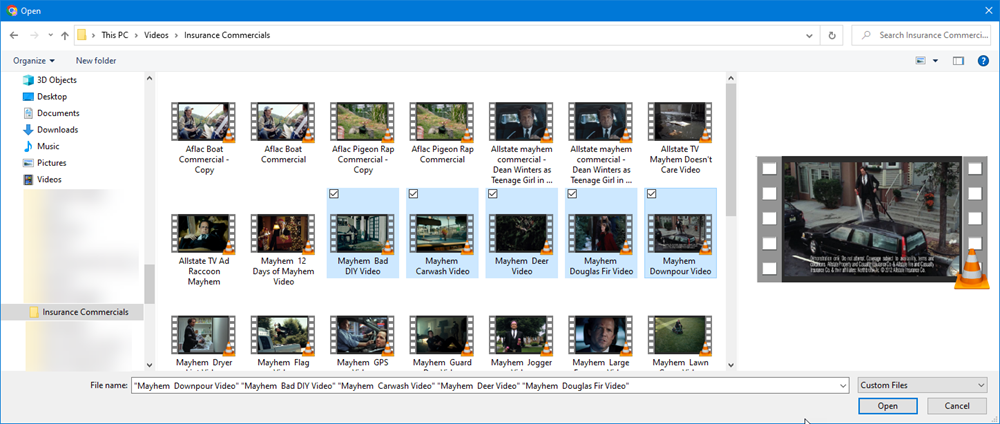
Selecting Add > Media will bring up the Windows File Explorer where you can make your selection.
- Click individual files to upload a single item.
- Use Ctrl+click to select multiple files to upload.
- Use Ctrl+A to select and upload all the files in the folder.
The selected file (or files) will appear in the CONTENT window under the folder where you right-clicked.
If you haven't created or selected any folders in the Content Library, the content will appear under the MEDIA & TEMPLATES section. This is the library's root folder.
Depending on the size of the file, you will see a progress bar appear as the file uploads.
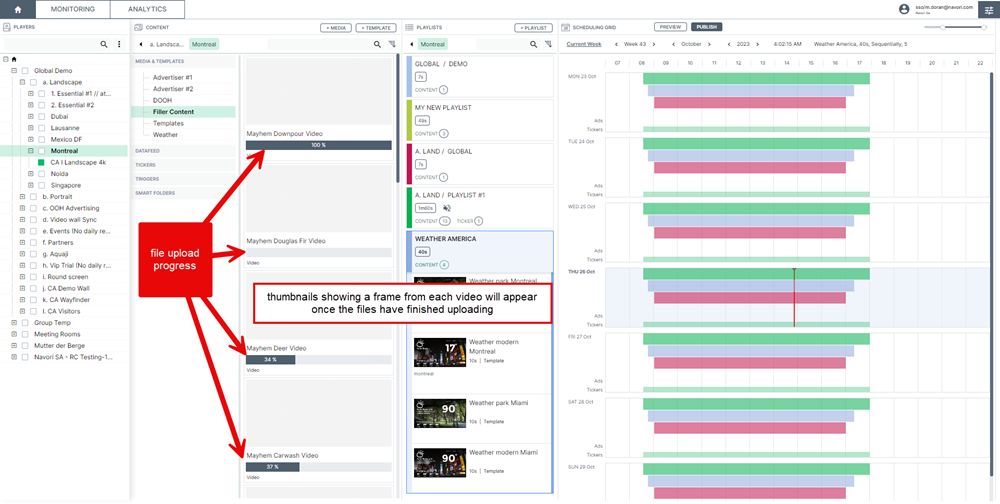
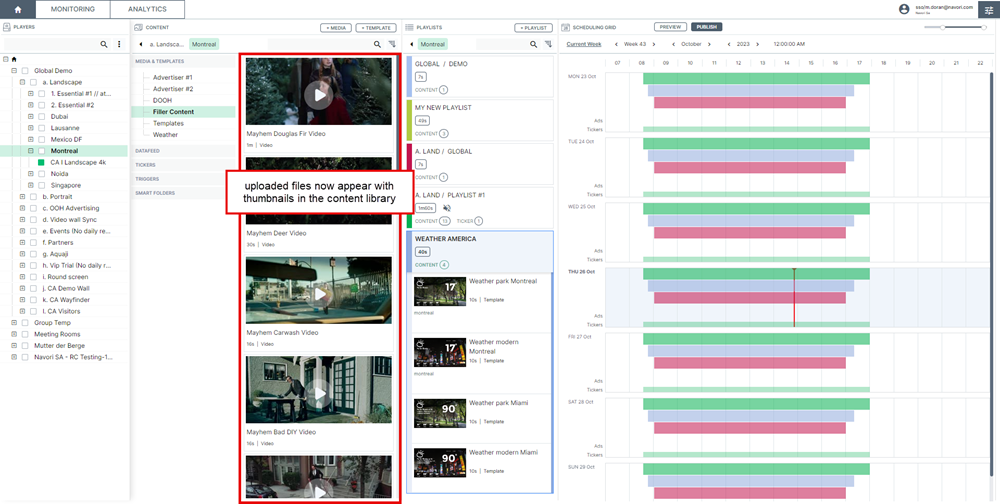
Once the file has been uploaded successfuly, a thumbnail will be generated.
You may drag and drop the newly uploaded content into the playlist, or edit the content's properties.